


Welcome to this comprehensive guide on using WordPress and the Gutenberg editor with the Advantage Minimly theme. Whether you’re new to WordPress or looking to enhance your editing skills, this guide will walk you through the essential steps to log in, navigate the dashboard, edit pages, and preview/save changes. In this guide, we will cover the following key topics:
- Logging into WordPress
- Understanding the WordPress Dashboard
- Navigating to the Page you want to Edit
- Understanding the Editor
- Editing a Page
- Previewing and Saving Changes
Logging into WordPress

- Open your preferred web browser and enter your website’s WordPress login URL. Usually, it’s something like “www.yourwebsite.com/wp-admin”. Replace “yourwebsite.com” with your actual website’s domain.
- On the login page, enter your username or email address, and then your password.
- Click the “Log In” button.
Understanding the WordPress Dashboard
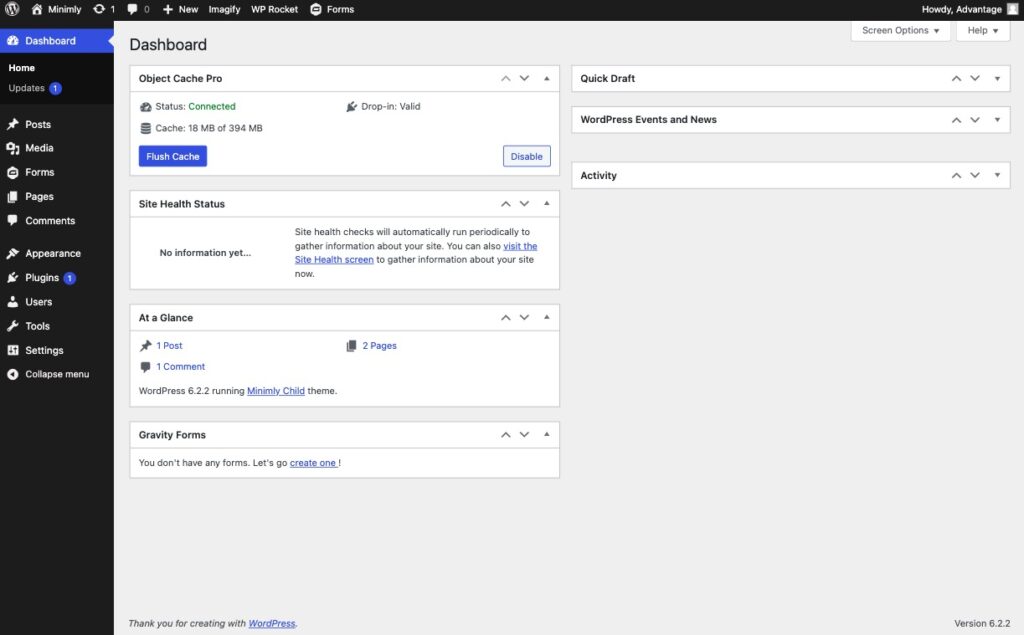
After you log in, you’ll be directed to the WordPress dashboard, which is the main control panel for your website. Take a moment to familiarise yourself with the various sections:
- Dashboard: This is the main overview of your WordPress site, displaying some quick stats and recent updates.
- Posts: Here, you can create new blog posts or edit existing ones.
- Media: This section houses all the files (images, videos, etc.) you’ve uploaded.
- Pages: Here, you can create new pages or edit existing ones.
- Comments: This section lets you manage comments made on your posts.
- Appearance: This is where you can change your site’s design and install new themes or customise existing ones.
- Plugins: Here, you can add new plugins or manage the ones you’ve installed.
- Users: In this section, you can manage your user profile or add new users.
- Settings: This section is for configuring the basic settings of your WordPress site.
Navigating to the Page you want to Edit
- From the left-hand side menu of your Dashboard, click on “Pages.”
- You’ll see a list of all the pages on your website. Locate the one you wish to edit and click on the page title.
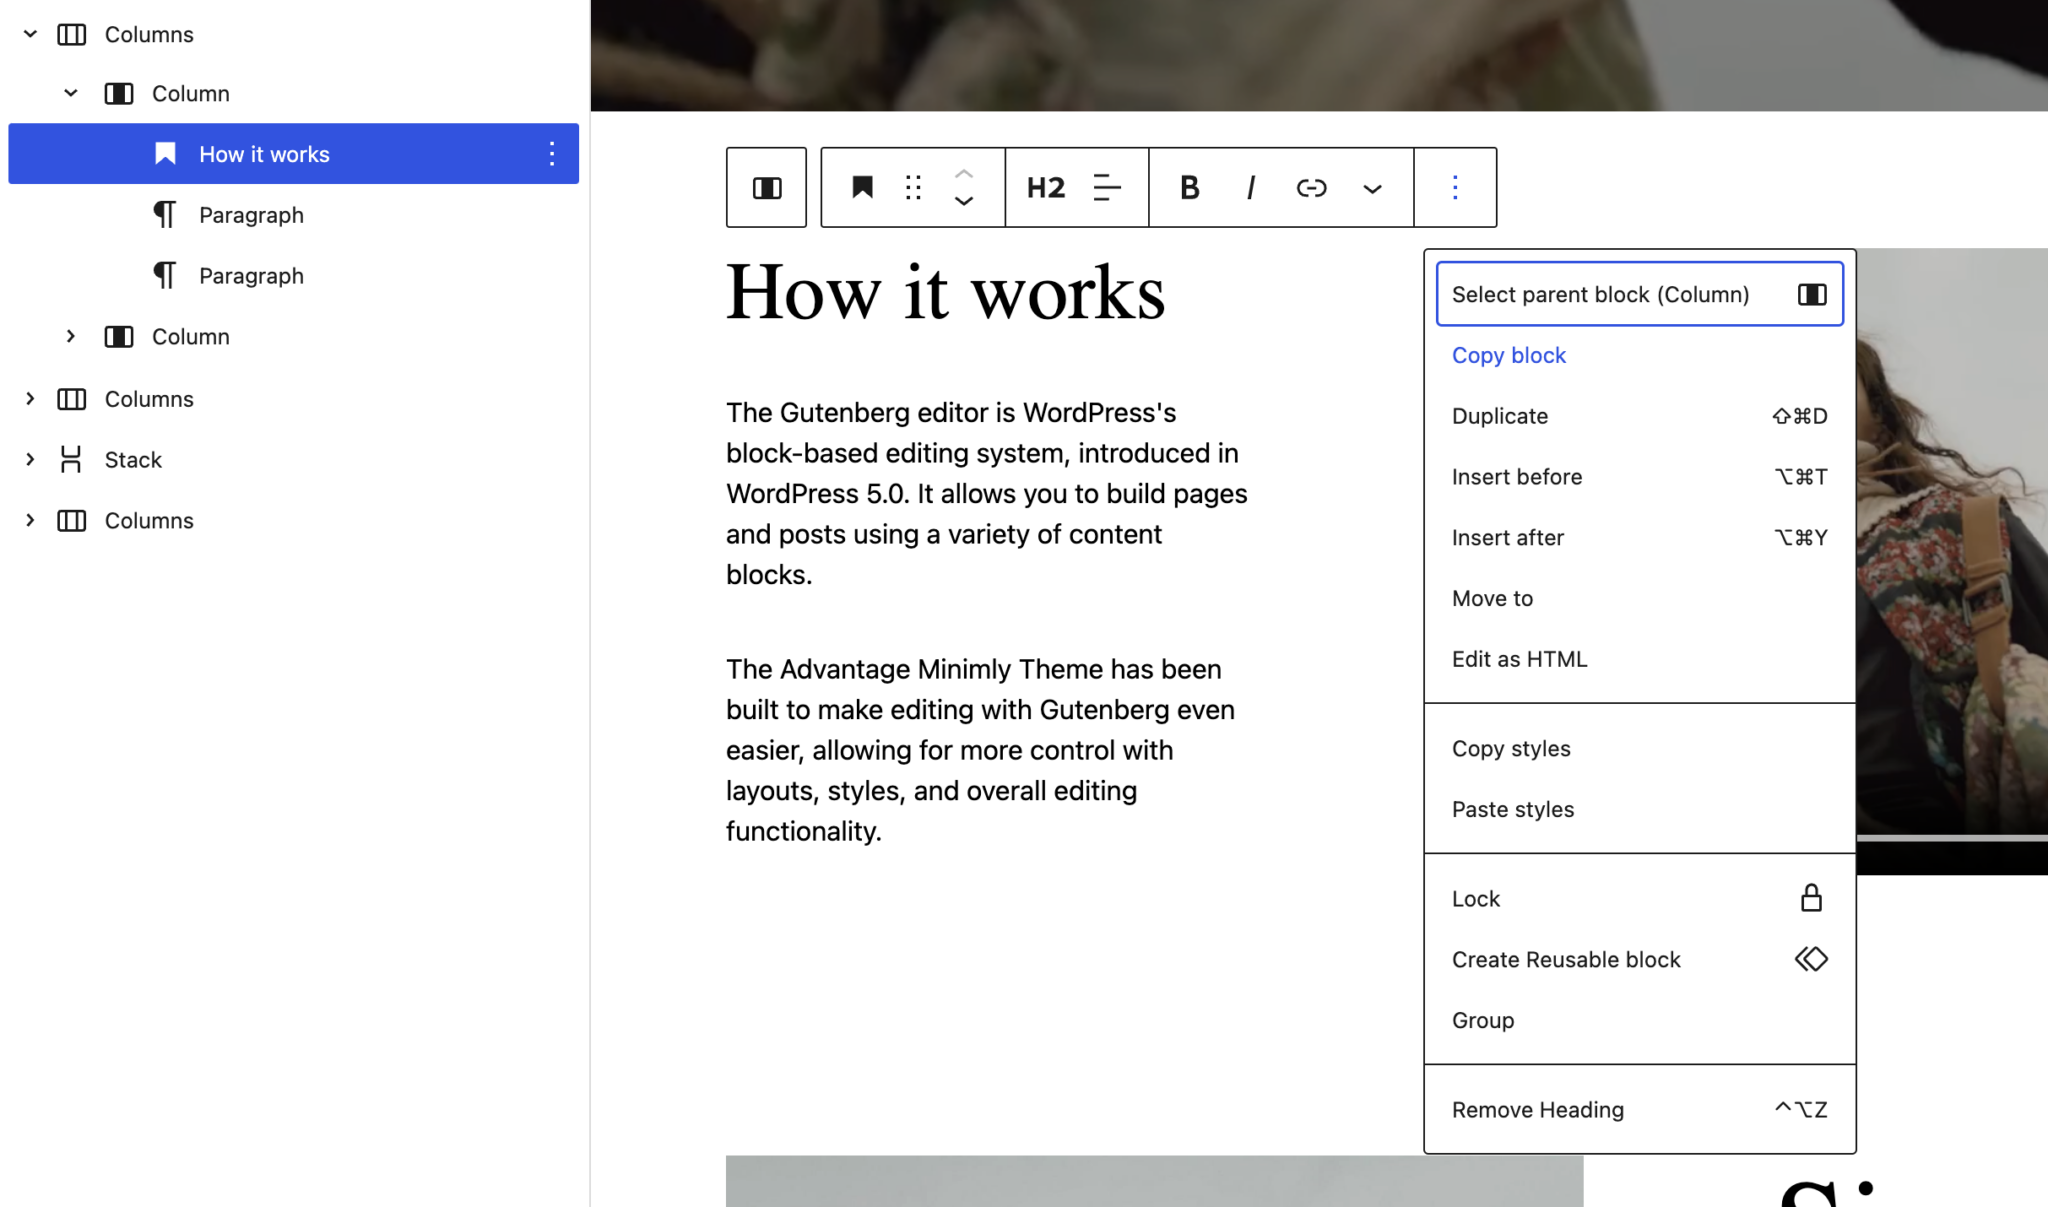
Understanding the Editor
The Gutenberg editor is WordPress’s block-based editing system, introduced in WordPress 5.0. It allows you to build pages and posts using a variety of content blocks. The Advantage Minimly Theme has been built to make editing with Gutenberg even easier, allowing for more control with layouts, styles, and overall editing functionality.
- Adding Blocks: Click on the ‘+’ icon in the upper left corner or within your content to add new blocks. You’ll find many types, such as Paragraph, Heading, Image, List, Quote, and more.
- Editing Blocks: Each block has its own editing options, typically appearing at the top of the block when you click on it. You can also change the block type by clicking on the icon on the left side of the block’s toolbar.
- Moving Blocks: To move a block, you can use the up and down arrows that appear when you hover over the block.
Editing a Page
- Click on the block that contains the text or media you want to edit. This will make the block active and show the block’s specific toolbar.
- Make your desired changes. If it’s a text block, you can directly type in or delete text. For an image block, you can replace the image or adjust its alignment, size, etc.
- To add a new block, click the ‘+’ icon and select the block type you want to add from the list that appears. Then, add your content to the new block.
- To delete a block, click on the block you want to remove, and then click the ‘More options’ (three vertical dots) in the toolbar and select ‘Remove block’.

- Copying and pasting blocks maintains layout/style consistency and allows pasting on other pages. To copy, click a block, select ‘Copy block’ from the ‘More options’ menu (three dots). Choose a section, click ‘More options’ again, and pick ‘Insert before’ or ‘Insert after’. This creates a new paragraph block to paste using a shortcut or right-click and ‘Paste’.
Step 6: Previewing and Saving Changes
- As you’re making changes, it’s a good idea to click on the “Preview” button at the top right of the page. This will open a new tab showing you how the page will look to visitors.
- Once you’re satisfied with your edits, click the “Update” button.
For more tips on how to use the editor, check out this video by CreatorImpact